Wednesday, May 7, 2014

Performing with good intonation and dynamics

How many times have you been to a school instrumental concert where the music is constantly loud and out of tune? Especially with younger musicians, this is quite often the case. While this performance is cute when your favorite child musician has his/her first few concerts, it may grow less tolerable as they grow up. This is why it is important that private instructors and band directors introduce proper tuning methods and pitch tendencies to new students.

Intonation is a critical issue for any instrument in an ensemble but intonation errors can be especially revealing in the flute section. This is because they are often playing the highest parts in the ensemble leaving them the most audibly out of tune.

During ensemble rehearsals, it is common to make slight adjustments in order to conform to the pitch tendencies of your instrument and the rest of the group. To insure that your instrument is in tune, remember these steps:

1) Warm-up your instrument. You can start this by completely covering the embouchure hole with your mouth and blow air through the instrument while closing all of the keys. Next, begin to warm up your embouchure. As you play, your flute will become warmer. Keep in mind that this will likely cause the flute to go sharp if you have not warmed up very much before you tune.

2) When you begin a rehearsal, be sure to check your intonation with a piano or to the other instruments in your ensemble. In an orchestral setting, the oboe usually gives the tuning pitch as it is centrally located and has a naturally prominent sound. If you get the chance, work with an electronic tuner or tuning fork before going to rehearsal. That way, you will only need to adjust slightly (if at all) when the ensemble tunes. After I have tuned and warmed-up a little, I sometimes like to practice my scales and etudes against a droned pitch on my metronome. You can program most electronic metronomes to hold drones on pitches at different ranges which can really help intonation problems in different registers.

3) Remember that as the temperature rises and falls so does the pitch of your instrument. Listen carefully to the other instruments to determine how you need to adjust. To lower your pitch you can, drop your jaw and lower your head or pull your upper lip down to direct your airstream lower into the flute.

Also, do not forget that when tuning chords with a wind ensemble, the third of a major chord should be lowered a little and raised a little in minor chords. This is because contemporary tuning practices are only a compromise that allows us to play in all keys with a tolerable amount of incorrect intonation. When playing with variable pitched instruments, we can approximate the naturally occurring physics of intervals ringing in tune by adjusting the thirds.

There are certain pitch tendencies to be aware of on the flute:

In the low register, B, C, C-sharp and F tend to be low. In the middle register, C-sharp tends to be high and F tends to be low. In the high register, D tends to be low and E-flat, E, F-sharp, G-sharp, B, and C are high. The easiest method of modifying the pitch is changing the direction of the airstream as described in the third bullet above, but there are also alternate fingerings that can be considered in order to facilitate technique and intonation. Some teachers may believe that there is only one ‘good’ fingering for each note on the flute, but keep in mind the wise words of flutist Michel Debost, “I soon realized that morality and ethics have nothing to do with fingerings. Musicality is the issue, because good can be unmusical and bad more fun”. Feel free to experiment with various fingerings and make decisions based on your liking. Special fingerings can often be an easy way to compensate for intonation differences between instrument types.

The dynamic level you are playing will also affect intonation. A forte is naturally resonant on the flute, but be careful not to let it become uncontrolled. Keep in mind that the pitch tendency is to go sharp while playing forte, and this partially due to uncontrolled air, timbre, and focus. To successfully carry the forte, you must keep a low center of gravity, open the throat, and remove any obstacles of the air column.

Playing piano requires more concentration and effort. It is easy to let softer passages feel dead because of the lack of power in the sound. It is up to the player to provide artificial sustenance to drive piano passage work. The pitch tendency is to go flat, and this is due to slower and unfocused air. It is important to avoid closing off the throat while playing piano. Be sure to keep the cavities open. Imagining the feeling of yawning will help open the throat.

It is important to accurately portray the different dynamic ranges, but do not do so at the expense of the musicality of the passage! Keep in mind the pitch tendencies that these dynamics entail and exercise control over your sound. Exposing music students to these principles at a young age can only help them in their future as musicians.

---
Further Reading:

Toff, Nancy. The Flute Book :A Complete Guide for Students and Performers. Thi ed. New York, NY; 4: Oxford University Press, 2012; 2012. The Oxford Musical Instrument Series.


Forming Tone and Embouchure

Discovering flute tone is a process that each flutist has to come to terms with individually. That being said, there is a certain foundation that your teacher can help you establish that will lead you to a clear and full sound. After that, it is up to you to find your own nuances and tone color.

In general, your tone should sound round, clear, focused and centered, not thin or breathy. So, what can you do to make sure that these qualities come out in your sound? The foundation of these qualities comes from your air column, and it only takes slight changes in size, pressure, and direction to make an impact.
Your air column is made up of speed, size, and direction and your head-body relationship influences the air column. To maximize the air column, you must do the following things: 1) The body must be kept relaxed and arms held out from the body. 2) The head must be held up, making sure that the chin is not tucked into the neck and the flute will be placed lightly against it. 3) The tube of the instrument should run parallel to the embouchure, not the floor.

Aperture and embouchure regulate the air column. It influences the air jet speed, airstream size, distance from lip opening to flute edge, and the air jet angle. Depending on the register, desired tone quality, intonation, and thickness of the player’s lips, the lips should cover about one third of the embouchure hole. If they cover too much, the tone will become weak, thin, and muffled, and the pitch will go flat. If they cover too little, the tone will be hollow, heavy, shrill, and breathy, and the pitch will go sharp. Once the placement of the lips is established, proper aperture needs to be formed. The aperture will control how large the opening is that air will be released from and it will also direct the airstream.

Forming the aperture is similar to saying the word “pure”. The corners of the mouth and face must remain relaxed. The opening between the lips just gets smaller to affect the speed of the airstream. It is simply the difference in airspeed regulated by the size of the aperture that makes the difference between C5 and C6; the greater the airspeed, the higher the pitch. The best tone quality and projection occurs when the airstream is divided into two equal parts on the edge of the flute wall. The embouchure position plays a large role in determining the tone.

The size of the oral cavity also affects tone production. Jaw/tongue position also influences the size of the oral cavity. It is useful to keep in mind not only your mouth and throat resonances, but also your sinuses. Keep your larynx (Adam’s Apple) low by imagining yawning. Be aware of the relationship between your mouth and throat as this affects the volume of the cavity and the area of the opening.

What causes a fuzzy tone?

1) Misdirection of air: Too much or too little coverage of the embouchure hole
2) Too small a lip aperture for the desired range/dynamic
3) Too large/loose an aperture: One that is incorrect for the airstream shape
4) Sometimes the flute itself: It is important to realize that not all problems with tone are caused by the player. This is why the flute instructor should test out your instrument at the first lesson.

While experimenting with tone, don’t forget that beauty is in the eye of the beholder. What one flutist may find a garish quality, another thinks is stunning. Your tone is your voice on the instrument, and don’t be afraid to make it your own!

By keeping all of these ideas in mind, you are on your way to producing a beautiful tone!

---
Further Reading:

Toff, Nancy. The Flute Book :A Complete Guide for Students and Performers. Thi ed. New York, NY; 4: Oxford University Press, 2012; 2012. The Oxford Musical Instrument Series.

Ornamentation According to Quantz and Tromlitz:

The key to understanding Baroque performance practice is knowing how to properly ornament. Quantz and Tromlitz both had opinions on ornamentation that were as follows:

Quantz's Views

1) Appoggiaturas:

The appoggiatura is a Baroque embellishment where a note is suspended from a preceding one. Many contemporary editions of Baroque music have these ornaments written in, but they were traditionally added by the performer. According to Quantz, the direction from which the appoggiatura occurs depends on the direction of the notes preceding it. If the notes preceding are descending, the appoggiatura will also descend. The opposite is true when the notes preceding come from below. There are two different types of appoggiaturas: passing and accented. An appoggiatura is passing when it is accompanying a pattern of thirds. These notes are placed before the beat and are also tongued lightly and slurred together. An accented appoggiatura occurs on a downbeat and takes half the length of the note it is ornamenting.
 

2) Turns
There are various short ornaments stemming from the passing appoggiatura that are common in the French style of flute playing: The half-shake, mordent, and turn. The half-shake is a trill stemming from an appoggiatura taken from above (this is why when we play Baroque music today, we are taught that performance practice for the time was to start the trill on the upper note). The mordent is a trill stemming from an appoggiatura taken from below, and a turn embellishes the appoggiatura by touching the notes above and below it before landing on the note being ornamented. There are also battemens which are used to ornament the notes in leaps too large for the use of passing appoggiaturas.


In Quantz’s opinion, these elaborations on the appoggiatura serve to promote "cheer and gaiety" while the simple appoggiatura arouses "tenderness and melancholy."


3) Trills/Tremolos:

Trills almost always begin with an appoggiatura that proceeds the note from above and its length and speed is dependent on its purpose. The player has to make those decisions within the context of the piece. Regardless of the decision, the trill should be played evenly. At the end of each trill, there should be two little notes added called the termination. Quantz also mentions that tremolos (trills between notes of a third apart) are not to be done on the flute, and this is partly due to the cross fingerings required on the one-keyed flute, which made those intervals impossible.

Tromlitz's views:

1) Flattement

An undulating, fluctuating motion which is made on a long, held note, and can be slow or fast, uniform or waxing and waning. This is done by partially opening and closing the next hole down, and it is used on long notes, fermatas, and on the note before a cadenza. Tromlitz states in The Virtuoso Flute Player, "It is not done with the breath on the flute: this does not have a good effect, but makes a wailing sound; and anyone who does it spoils his chest and ruins his playing altogether, for he loses its firmness, and then cannot keep a firm and pure tone; everything wobbles out from the chest."

2) Appoggiatura

A suspension of a note by a preceding note. They are done in long or short styles, and these rules apply for simple meter.

In the long style, if placed in front of a note, it is worth half of it. If there is a dot after the note, it is worth as much as the written note, and the dot is played alone. The same happens if instead of a dot there is a rest after the note.

The emphasis is placed more on the appoggiatura than the note, and when possible, there should be time to grow into the strength of the appoggiatura and slur weakly into the main note (This is called an Abzung). It should fall on the beat whether it is long or short. The short appoggiatura comes on the beat at the same time as the note in front of which it is placed.


3) Passing appoggiatura

Take their value from the previous note, but are slurred to the next. These are only supposed to be placed between descending runs in thirds. There is also another kind which consists of two little notes, which also take their value from the previous note; the first of these is a step lower or higher than the previous note, and the second touches on the pitch of this note again. There is also the slide, which consists of two little notes which are slurred from the distance of a third either above or below to the following note

4) Double appoggiatura

An ornament of two little appoggiaturas of different value before the main note, one below it and one above. It can involve various notes of the scale, but if there is a note before it, it usually takes the same pitch for its first note. The second note is always a step above the subsequent main note.

5) Gruppetto

An ornament that consists of three, and sometimes four notes, and is either played freely; or in time if there is a note at the same pitch preceding; or attached to a long rising appoggiatura; or it is between two notes of equal value, or also if the first is dotted. It is made from above and from below.


7) Short trill and schneller

An ornament consisting of two notes, sometimes of four; connected either to a descending appoggiatura, or to a preceding good note. The short trill consisting of two notes comes on the good note in stepwise descending sequences. It can also be used freely on good and bad notes alike; and this kind is called a "Schneller", which is notated with a sign resembling the umlaut. With four notes, it is comparable to a turn today. With two, it is just a short trill starting on the note and then going to the note stepwise above it. When it refers to the Schneller it is indicated with small notes. Used in spirited/lively movements

8) Mordent

An ornament that consists of two little notes, like the short trill, but functions backwards by beginning on the main note, going to the one below, and returning to the main note. These can be short or long (single or double). The short one occurs simultaneously with the note and the long one consists of four notes and takes its value from the note which stands.

9) Battement  

What Quantz would have called a short mordent (see Quantz no.2)

It is important to think about how to perform Baroque music on a contemporary instrument. I read an article on the Flutist Quarterly that was authored by Kathy Borst Jones and interviews Nancy Hadden that compares the realization of Baroque ornamentation on both instruments. One thing she mentioned was that the appoggiatura sounds completely different on the Baroque instrument. She says, “Playing appoggiaturas and ends of phrases make so much sense on baroque flute; on the modern flute you can play right through those and not even notice!”

Don’t be afraid to experiment with Baroque ornamentation! I hope you learned from today’s post that while there are rules, much of ornamentation is about comprehending the context of the piece and adding tasteful embellishment. Try exploring different interpretations and see how that affects the piece!

I’ll leave you with the words of Quantz to ponder when contemplating the use of Baroque ornaments: "Since music should now rouse the passions, now still them again, the utility and necessity of these graces in a plain and unadorned melody is self-evident."

---
Further Reading:

Quantz, Johann Joachim, and Edward R. Reilly. On Playing the Flute. Fir paperback ed. New York: Schirmer Books, 1966.

Tromlitz, Johann George, and Ardal Powell. The Virtuoso Flute-Player. Cambridge England; New York: Cambridge University Press, 1991. Cambridge Musical Texts and Monographs Web.

An Intro to Hotteterre, Quantz, and Tromlitz

Throughout the history of the flute, there are many flutists and flute makers that have made an impact of the instrument’s development. As I’ve continued studying this history, I’ve been introduced to the treatises of flutists Hotteterre, Quantz, and Tromlitz.

The first treatise I read was authored by Jacques Hotteterre who lived from the1680s to the early1760s and was a self-proclaimed expert on the instrument, like many flutists were at the time. Hotteterre’s credentials are that he descended from a family of flute makers and he served as the flutist of the king’s court. It was this flute treatise that made him famous in 1707.

I also read “On Playing the Flute”, a flute treatise authored by Johann Joachim Quantz. Living from 1697-1773, he served as composer, flutist, and flute maker to King Frederick II of Prussia. You may be already familiar with his flute concerti, but you might find in this treatise not only an explanation of proper Baroque flute technique and performance practice, but an in-depth discussion on what qualities make for a successful musician.

Not much research had been done since Quantz’s work was published until the release of “The Virtuoso Flute Player” by Johann George Tromlitz. Tromlitz used Quantz’s work as a model and elaborated on it. Tromlitz’s work was published in 1791 and he lived from 1725-1805. He joined the Grosses Konzert orchestra in 1754 and also began performing solo tours around this time. In historical accounts, his flute playing has been viewed uniformly positive. As well as a flutist, he is also a flute maker and composer, although it is said, “He merely builds his own flutes as a musician concerned with playing the most accurate instruments”.

All three flutists make valuable commentary on flute playing in their respective works. Hotteterre begins by stating the basics: Stand/sit tall, hold hands high without raising the elbows or shoulders, keep the left wrist bent inwards slightly and the left arm closer to the body than the right arm, but then he continues to say that there should be absolutely no movement with your body or head while playing, your right hand fingers should be almost straight, and when standing you should place your left foot in front of your right and keep your weight on the right hip. Coming from a contemporary perspective, I cannot imagine performing or practicing with absolutely no movement and I do not recommend it. Practicing without motion would lead to rigid playing and would put the flutist at higher risk for related injuries. I also believe that allowing the motion of the flutist encourages higher musical expression (although there are also problems with motion in excess). Also, while it was appropriate to straighten the right hand fingers on the open holed transverse flutes, proper curvature to all fingers is important on today’s instruments as it allows for greater technical facility. In terms of stance, I know that some flute teachers have their beginning students put the left foot forward, but I believe in a comfortable but balanced position. Almost anything goes as long as the flutist’s weight is evenly distributed, which is why I was also surprised that Hotteterre specifies that the flutists weight be focused on the right hip.

Quantz elaborates on posture by describing the proper way to hold the flute and place the fingers on the keys. Since there was no thumb key at his time, the left thumb was to be placed directly under the left middle finger and was slightly curved. Because of this, the left thumb was in control of maintaining the flute’s balance instead of the right. The flute rests upon the fleshy portion of the first joint of the finger (as is still done today) and equilibrium should be formed between the chin, left thumb, and left pointer finger. On the right hand, the thumb should be curved under the pointer finger and the rest of the fingers should be curved over the keys. Instead of the right thumb being a balance point, like it is today, it merely keeps the rest of the hand in proper position above the keys. This helps to eliminate all unnecessary movement. The fingers should not be lifted too high, or that will throw off technique. The head should also be kept naturally up will allow for proper breathing. A lowered head would constrict this breathing and so would a hyper-extended head. The arms should not be pressed against the body, but be a little outwards.

Tromlitz emphasizes the fact that posture is a critical part of flute performance. First, you will perform better if you are poised and relaxed, but secondly, you will carry a poor impression to the audience if your stance is poor. Good posture is required for a good performance! Tromlitz states, "…do not stand there twisted and crooked and hunched up, holding the flute as though to crush it to pieces; otherwise you will force the air out into the flute with precisely the same strength as you are using to grip the flute itself." He encourages standing up straight and relaxed with the feet close together, but the left one a little forward. The head is held up and looking forward. The left hand holds the flute with the left hand similarly to how Quantz described it, and the right hand thumb should be placed in between the pointer and middle fingers. The tip of the thumb is positioned so that the fingers are in proper placement and not too far extended or curved. Like Hotteterre, Tromlitz also specifies that the right hand fingers be mostly straight, but on today’s instrument, slight curvature is required. As with Quantz, the left hand should be solely responsible for the flute being held securely. The little finger must also be the correct distance above the key so that it is ready when needed. Both arms are held away from the body and the flute forms a straight line.

As each of these experts only had the instruments of their time available to them, they developed slightly differing views on flute playing, but many aspects stayed the same. We have these three to thank for much of what we know about flute development and traditional performance practice today, and formed the basis for improvements to come.

---
Further Reading:

Hotteterre, Jacques. Principles of the Flute, Recorder & Oboe. Barrie & Rockliff, 1968.

Quantz, Johann Joachim, and Edward R. Reilly. On Playing the Flute. Fir paperback ed. New York: Schirmer Books, 1966.

Tromlitz, Johann George, and Ardal Powell. The Virtuoso Flute-Player. Cambridge England; New York: Cambridge University Press, 1991. Cambridge Musical Texts and Monographs Web.

On Performing with a Masculine Sound:

Alright, the title is not really what today’s post is about. I just found it very interesting that Quantz describes the best flute players as being able to produce “…a clear, penetrating, thick, round, masculine, and withal pleasing sound from the instrument.” I understand that the tone should be clear, round, and withal pleasing, but the other words left me puzzled—ESPECIALLY masculine. What does masculinity or femininity even sound like? Word choice aside, it is important that each flutist develop a controlled tone.

Remember that before thinking about tone, we must establish a proper flute embouchure. Quantz reminds us that the embouchure hole should be centered on the lips and half covered by the lower lip. When blowing, the air is divided in half by the edge of the embouchure hole, resulting in sound production. If too much of the hole is left uncovered, the tone will be airy or hollow. With the opposite, the tone will be too weak. People with very thick lips may have problems finding their embouchure. Sometimes, adjusting the embouchure slightly to the left of the hole helps with this problem. Also, be sure to take care of your lips! Avoid eating and drinking things that your lips are sensitive to, stay healthy, and protect your lips from the elements.

Even after the flutist has developed their tone, there is still a good portion of the sound quality that is dependent on the flute being played. I remember playing my student flute for eight years before getting my first professional model. It was not before playing my new flute that I realized how much all of my tone studies had paid off! These differences in tone are made by the types of metal used in flute models. Even a different head joint or crown can change the tone you can produce. Once you own a professional flute and are happy with how you have developed your tone, I would suggest going to a flute shop and experimenting with these options (as far as your funds will allow you).

Quantz describes the need to move the chin and lips forwards and backwards in order to properly play ascending and descending notes. The distance required is determined by ear. Flutists are taught today that accelerated air is used in the upper register and slow air is used in the lower, but Quantz says that the wind should never be increased or doubled, but the notes are changed by the compression of air in the mouth hole which is adjusted by the chin and lips.

Although Tromlitz repeatedly mentions in his work that tone is a matter of taste and that not all people like the same aesthetic in their tone, he still has some specific opinions on what is and is not good tone. His rule of thumb for a pleasant tone is: “If the tone is clear, resonant, and pleasing, it will indeed please the majority”. He also states that the model any instrumentalist should form his tone off of is a beautiful human voice. He defines this voice as being, bright, full and resonant, of masculine (there is that adjective use again…) strength, but not shrieking; soft, but not hollow. It should be rounded, singing-like, soft, and flexible.

Tromlitz suggests that you develop tone by practice playing single notes for as long as possible while turning the flute outwards and then inwards until the right spot is reached for a firm and rich tone. Even today, this is not a bad idea for tone development. As you adjust your head joint position, listen carefully to the sound you produce for your sweet spot. Once you have that sound you like in your ear, try to remember how your flute feels on your face and then take your flute away and see if you can find the spot again. This will lead towards a consistent good tone!

In terms of performance practice for articulation, there are definitely some variables between that which Hotteterre, Quantz, and Tromlitz describe and what is commonplace now. Before I go into detail about his views were it is important that I remind you of the purpose of articulation during the Baroque. Articulation was mainly used to define the meter of a movement. Many articulations were assumed, which is why there are not many (if any) articulation markings on the urtexts of these works. Also, slurs are rarely used, but when they are they only last for about the duration of a beat.

Hotteterre specifies that notes be articulated using the syllables “Tu” and “Ru”. These syllables seem weird to us today, but that is because we do not play instruments made out of wood. Quantz had a similar system where he used “Ti” and “Di” for stressed notes and “Ri” for those that are unstressed. He also used “Tiri” and “Did’ll” for double tonguing, but emphasizes that this technique should only be used on the fastest passagework. Tromlitz similarly used “Ti” or “Di” for single tonging and “Tid’ll” or “Did’ll” for double. Today we use “Tu” or “Du”, but that is because the instrument has made extreme developments over the years. When double or triple tonging we may incorporate the syllable “Ku”. To use the Baroque syllables on our contemporary flutes would hardly have an effect.

In studying Baroque performance practice, we learn just how far flute technique has come. I have been really interested by the fact that not too much has changed! The only major change was in the articulation syllables used, but that was because the flute is now made out of a different material than it was then. Your understanding of these differences can contribute to your ability to interpret Baroque music!

---
Further Reading:

Hotteterre, Jacques. Principles of the Flute, Recorder & Oboe. Barrie & Rockliff, 1968.

Quantz, Johann Joachim, and Edward R. Reilly. On Playing the Flute. Fir paperback ed. New York: Schirmer Books, 1966.

Tromlitz, Johann George, and Ardal Powell. The Virtuoso Flute-Player. Cambridge England; New York: Cambridge University Press, 1991. Cambridge Musical Texts and Monographs Web.

Tuesday, May 6, 2014

Of the Adagio and Cadenzas:

To any musician, personal expression is the key to an authentic performance. While people can drill their technique to the point of (near) perfection, if the music lacks emotional ties the performance is empty. This is easier to grasp with a contemporary piece of music, but when performing the Baroque, it is necessary to understand to context of the time period.

It is easy to think that the adagio will be simplest to learn because it lacks the speed to make it technically challenging, but it is actually complex to interpret. This is especially true about the Baroque adagio, which is meant to be ornamented by the performer. While anyone can sit down and sight-read an adagio movement, they are not taking the time to realize all of the nuances that go into its expression and Quantz would be horrified with the resulting sound.

Before attempting to play the adagio, it is important to understand the different types. There are French and Italian styles. The French uses the ornamentations we talked about last time to lightly highlight the pre-existing melodic structure and would seem dry without them. Harmonic understanding is not required in order to appropriately ornament. In the Italian style, the harmony is essential to understand when developing extensive embellishments over it. Harmonic movement drives the Italian adagio.

Adagio, Italian for “at ease,” is meant to be realized gently and expressively down to each individual note. Quantz states that in order to play one well, the performer must insert calm to the melancholy mood of the piece. He loved messa di voce and flattements in the context of the adagio. Messa di voce is when there is a dynamic swell through a long sustained note of a whole or half bar. It will conclude with a flattements, which is using the fingers to produce a light vibrato. It must be remembered that vibrato is used as a light ornament in Baroque music whether you are playing on a Baroque or contemporary instrument. The moving notes that follow a held note can be played out and it is a good practice to think of dynamic growth between each individual note of the adagio. Using a slightly different method of ornamentation each time will make each repetition more expressive for the performer and more interesting for the listener. Be very careful of proper phrasing, as it is easy to disrupt the flow of the movement by breathing in the wrong place.

Cadenzas are also characteristic of the Baroque era. They are virtuosic unaccompanied lines written by the performer that are at the conclusion of a movement. These long embellishments of previously heard themes are popular in Italian music. Regular meter is rarely observed in the realization of a cadenza. They should sound to the audience as if they had been improvised. They use the principal theme of the movement combined with repeated fragments of other themes. Be sure not to move into unrelated or distant keys when writing a cadenza. Typical harmonic motion is from the tonic to the subdominant to the dominant and then back to the tonic.

It is important to pay attention to how both the Baroque Adagio and Cadenzas are performed because they need to have a quality that is appropriate for the time period the piece was written. When either of these sections are performed incorrectly, it takes away from the work as a whole. Just be sensitive to the style of the time period when interpreting how to perform a piece!

---
Further Reading:

Quantz, Johann Joachim, and Edward R. Reilly. On Playing the Flute. Fir paperback ed. New York: Schirmer Books, 1966.

Monday, April 28, 2014

The History of the Flute from Headjoint to Footjoint!

Transverse flute and Recorders

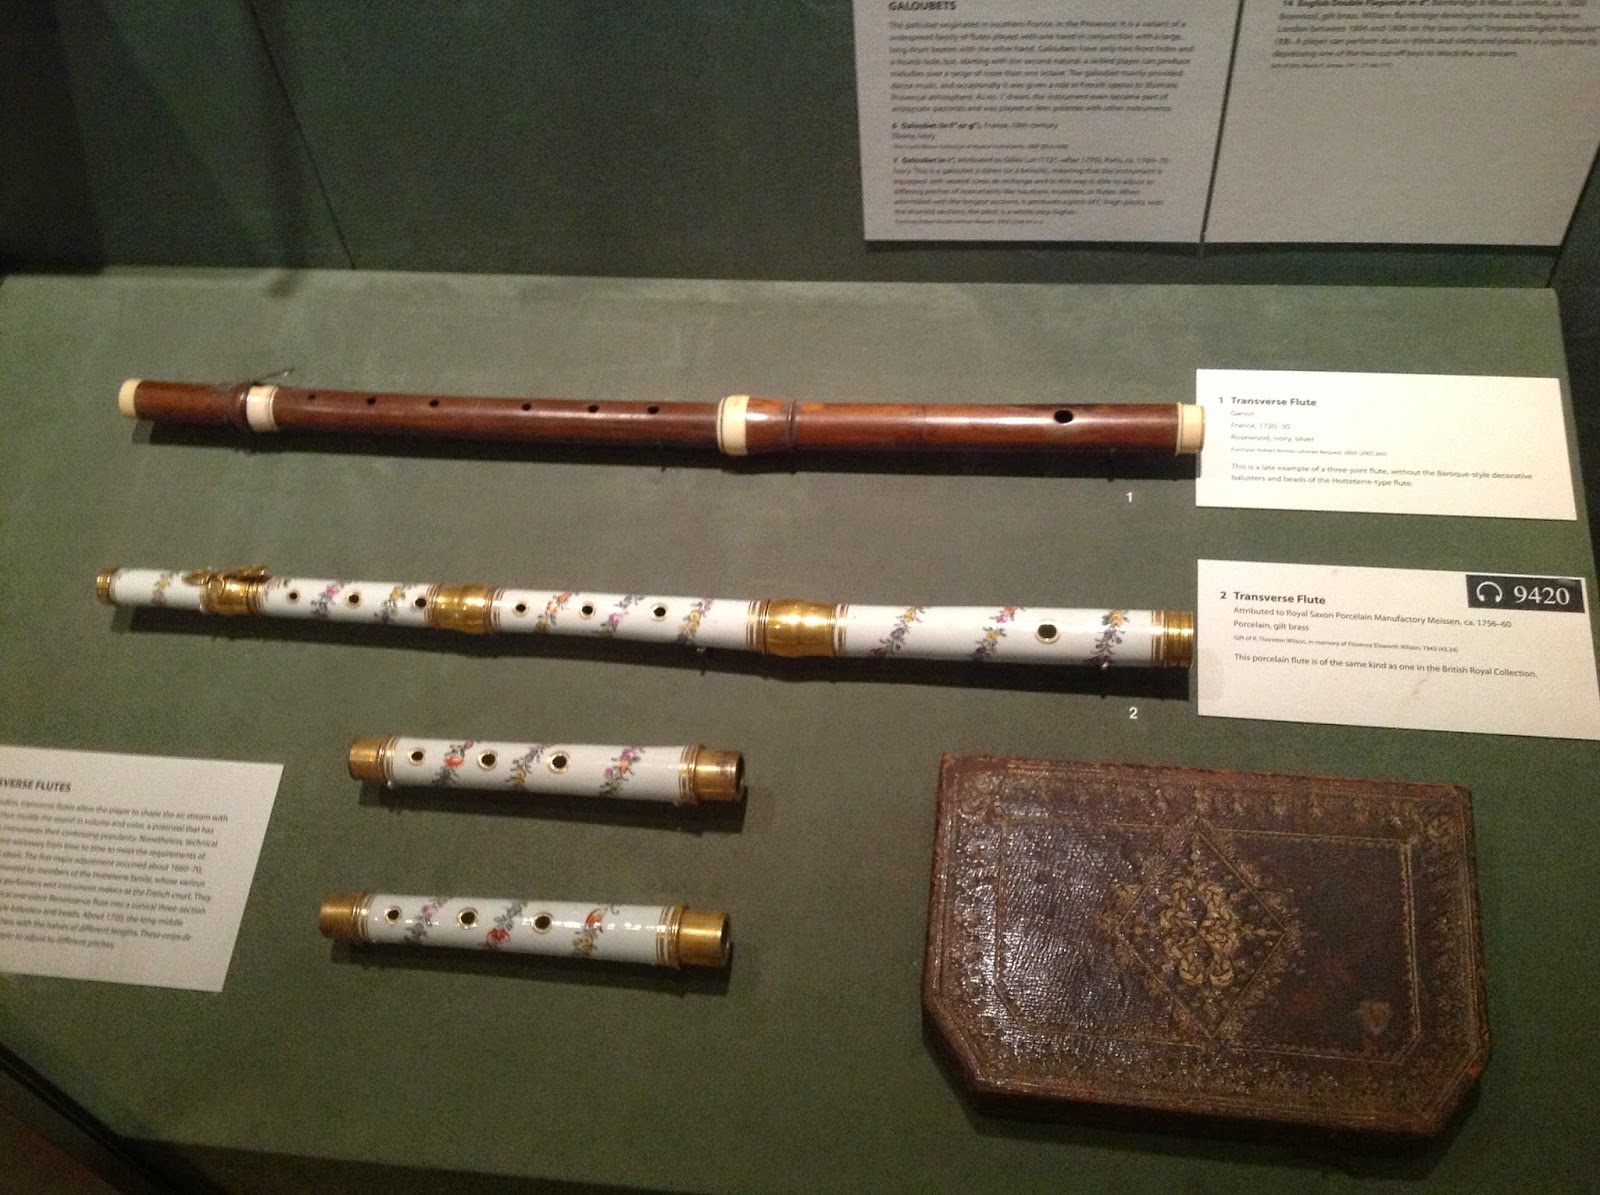
Flute history dates back to the Middle Ages (early 1500s) when the flute was a cylindrical piece of wood that sounded in D major. This transverse flute, known as a fife, was used most often militaristically. During the Renaissance (1600s), the flute continued to evolve and became more of a solo instrument than just military accompaniment. These flutes were in different pitches based on the vocal models (soprano, alto, tenor, bass). Each one had a two octave diatonic range beginning on either G or D and there were six holes spaced evenly across the instrument, so that fingers could easily reach them. While chromatic playing was possible on this flute, it was awkward due to cross fingerings with the open holes.


The early Baroque flute was similar to the Renaissance flute. They both had six holes that were spaced not according to acoustic principles, but to accommodate for finger span. As a result, the first and second octaves of the instrument tended to be flat and the F# required special fingerings in order to sound in tune. Hotteterre, a flutist and flute-maker whom I will discuss more in later blogs, decided to taper the bore in an attempt to correct the flute’s unstable pitch during the early 1700s. The head joint remained cylindrical while the body tapered to the foot, resulting in the instrument sounding less shrill. This was also the first time that flute was split into multiple pieces, allowing it to adjust to the varied tuning systems between geographic areas. The embouchure and finger holes were made smaller, and they could now be closer together because the tapering of the body adjusted for the pitch. Hotteterre added the first key to the flute: the closed D# key. It was added to cover the seventh hole which was after the E hole. This instrument still had a two octave range, but there were a few notes that could be forced over D3. Despite Hotteterre’s efforts, intonation continued to pose a problem for the flute. 


More chromatic keywork was added in an attempt to facilitate fingering and fix intonation. In 1760, the G#, Bb, and F keys were added to the already existing one-keyed flute. This removed most cross fingerings from the instrument. They continued to add the C foot-joint by 1774. The keys were not immediately accepted because keys at the time tended to stick and be unreliable, but it was soon realized that they effectively extended the range (D1-G3) and technical facility of the instrument. 


18th century transverse flutes

The 18th century resulted in the eight-keyed flute known as the “Meyer system” flute. A c2 key was added to control a hole near the B and C# holes in 1782, and four years later, Tromlitz, another prominent flutist and flute-maker to be discussed later, introduced the duplicate F-natural key which covered another hole made on the far side of the instrument that was controlled by a long lever. In the early 19th century, there were developments the mechanism of keys that would later be transferred to wooden flutes such as tenons and sockets, lengthened springs, and the design of key mountings as silver posts, and developments with open keys in order to improve intonation. At this point, the eight-keyed flute was the standard instrument, but performers still played all models dating back to the one-keyed flute and on to flutes that had more than eight keys. Theobald Boehm’s innovations led towards the standardization of flutes that is nearly the same today. 


With Boehm’s model came the beginnings of the modern flute. He started a completely new fingering system where each semitone was drilled into the instrument at its acoustically correct position and then the mechanism was developed to facilitate those holes. His 1831 model re-spaced the A, E, F, F#, and G holes and keyed them. He also used double jointed ring keys so that more than one key can be pressed at once. The 1832 used exact measurements for the acoustic placement of the holes and incorporated open key systems for their full venting. Nolan’s system of open key rings and horizontal rods facilitated the mechanism, allowing fingers to be able to stay in their normal position between D1 and B3. While much of the old fingering system was retained, there were still necessary changes made to it that turned off seasoned performers from buying this model, but eventually slight mechanical changes were made that allowed the system to catch on in France and it was accepted by the Paris Conservatoire in 1838.

Boehm’s 1847 model improved various aspects of the flute to improve its acoustics. A cylindrical tube was used instead of a conical bore, the embouchure hole was shaped in a rectangle and made larger, and the head joint curved towards the embouchure hole in the shape of a parabola. The tone holes were also made larger, requiring that padded keys cover them as they were now too large for fingers to cover. It was also decided that metal tubing was more resonant than wood and silver became a predominant metal used for flute making. In 1848, keys A, G, F#, E, and D were made open for acoustics, and in 1850 the alternate Bb thumb key was developed. This mode flute quickly caught on in France, England, and the United States, and it is essentially the same model flute performed on today with a few minor modifications. There are a few manufacturers that have revised the acoustical properties of the flute, resulted in a few named scales such as the Cooper and Armstrong scales. Recent research has focused on the materials used for construction, the size and shape of the embouchure hole, and manufacturing techniques. David Straubinger developed key pads that are much more resistant, and they are an option in contemporary flutes. While there will always be personal preferences in the types of materials and mechanism used on each flute, it is the model based on Boehm that flutists will continue to use as the flute develops.

---
Further Reading:

Powell, Ardal. The Flute. New Haven; London: Yale University Press, 2002. The Yale Musical Instrument Series.